How to Configure and Test Inbound and Outbound SMTP
| Status: | Published |
|---|---|
| Version: | 1.1 |
| Authors: | HTL QA |
| Applies to: | Supportworks ESP |
How to Configure and Test Inbound and Outbound SMTP
This document is mainly intended for Hornbill consultants, and brings together information already existing in various parts of the Supportworks on-line help and elsewhere.
Inbound SMTP
To configure inbound SMTP, please follow the instructions given here:
- Run the Supportworks Server Configuration utility.
- On the Inbound SMTP Mail Routing tab, select the "Enable SMTP services on this server" option and ensure that a domain exists.
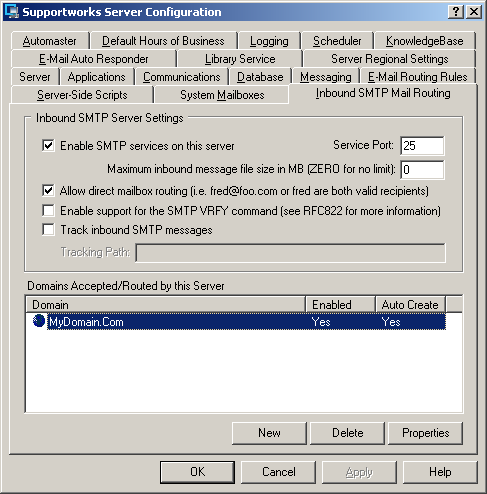
- If a domain does not exist, then create one by clicking New. Enter the domain name as MyDomain.com, for example, and add an address to the "helpdesk" shared mailbox.
- On the System Mailboxes tab (with the Shared Mailboxes option selected), open the properties of the shared mailbox and ensure that it has an associated address (perhaps the one you just added).


The server will now act as a "smart host" and accept any e-mail messages, received on Port 25, that are addressed to a valid recipient (that is, an associated address).
You can test this by first creating a new e-mail account in Microsoft Outlook Express. We are not concerned with POP3 at this time, so there is no need to enter a POP3 server. Simply enter "localhost" as the SMTP server. Then, once you have an account, compose an e-mail message within Outlook Express and send it to the address associated with the shared mailbox (for example, [email protected]).
The message should be received by Supportworks and should be visible in the shared mailbox.
Outbound SMTP
To configure outbound SMTP, you simply have to enter the server, port and signature details for the default SMTP configuration on the System Mailboxes tab of the Server Configuration utility and also for the SMTP configuration against the shared mailbox on the Services tab, as shown below.


Once you have configured the above, you can test outbound e-mail within Supportworks by simply sending a message to any SMTP address and checking that it has been received.